Yahoo! Pipes make it possible to aggregate data from different sources, change the data and combine it to a single output. In this post we will see how we can use output from our Blogger, Delicious, Twitter and Google Reader accounts and display them in one list.
We create Yahoo! Pipes using the Editor tool in our web browser. We go to Yahoo! Pipes. If we don't already have an account we must create one. Once we are logged in we click on the Create a pipe button. We get a big clean sheet to drop modules on. These modules are located on the left side of the screen. The modules can be used to define sources, operations and different manipulations. At the bottom of the screen we have the Debugger window. The Debugger window shows the contents of the pipe.
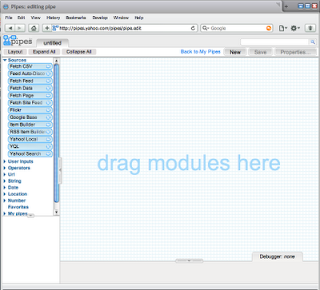
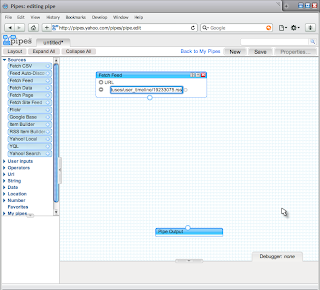
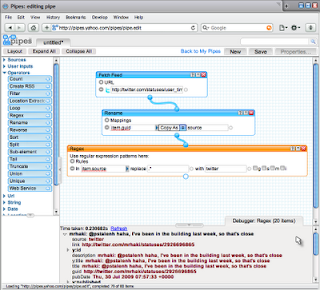
Let's first create a complete pipe to get the contents from our Twitter account, add some field to identify that the source is Twitter. We go to our Twitter page and look for the RSS feed link at the right and select the link. For my Twitter account the link is http://twitter.com/statuses/user_timeline/19233075.rss. In the Yahoo! Pipes Editor we select the module Fetch Feed from the Sources section and drop it on the canvas. Now we fill in the RSS feed link in the URL input field:
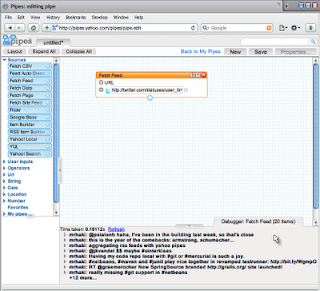
If we click on the module (we know it is active when the title bar turns orange) and look at the Debugger window we see the results of the feed:
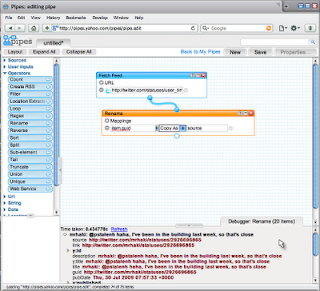
Well, that is a start. Now we are going to add a new field to the output. The easiest way to do this is to copy an existing field. We need the Rename module from the Operators section to achieve this. With this module we can rename an existing field, but also copy a field. We drag the Rename module on the canvas. We connect the Fetch Feed module to the Rename module by dragging our mouse from the connector dot at the bottom of the Fetch Feed module to the connector dot at the top of the Rename module. Both modules are connected and the fields from the feed are now available in a drop-down list in the Mappings of the Rename module. For our example we copy the item.guid field to a source field. When we refresh the Debugger window we see the new field source in the output:
The contents of the source field must be changed to the value twitter, so we know from wich source the contents is acquired. We drop the RegEx module on the canvas and connect the Rename module to the Regex module. In the Rules section we select from the drop-down list item.source. We want to replace the whole text so we apply the regular expression .* to replace it with the text twitter. We click on the refresh link in the Debugger window we see that the source field now has the value twitter:
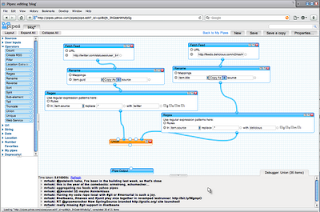
These steps need to repeated for every feed we want in our final output. For example if we want to include the output of our Delicous account we have to visit our Delicous page. Here we select the RSS link from the bottom of the page (mine is http://feeds.delicious.com/v2/rss/mrhaki?count=15. We use this URL for another Fetch Feed module. Then we add a Rename and Regex module to create a new source field with the value delicious. We can lookup the RSS links for our Blogger account and Google Reader account as well and add them to the canvas.
To connect both feeds into one output we use the Union module from the Operators section. We connect both Regexp modules to the top of the Union module:
We are almost done. For good measure we will sort the aggregated feed by date, so the newest items from the feeds are displayed at the top of the output. We drop the Sort module from the Operators section. We select item.pubDate and sort in descending order:
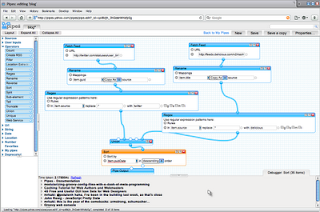
Finally we can join the Sort module to the Pipe Output to finish the pipe. To really use our pipe we must first save it. We click on the Save button and fill in a name for the pipe. After we have saved the pipe we get a link Run pipe... at the top of our window. We click on this link and a new window opens with our pipe output:
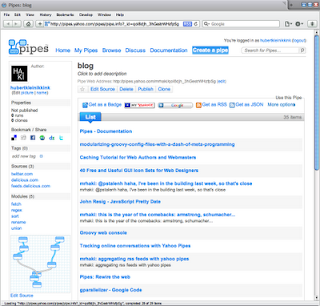
That's it. We can even subscribe to our newly created feed in a RSS reader, or we can create a badge for our website to display the results. In a next blog entry we will use the Get as JSON link to get the results in JSON format and use it with jQuery to display the results.
